
 490
490
This article reviews how to establish a connection to Sage Intacct in Accounting Link Online.
The image below outlines the Accounting Link Online connection requirements for Sage Intacct. Please follow the steps below to gather the information needed to complete the connection.
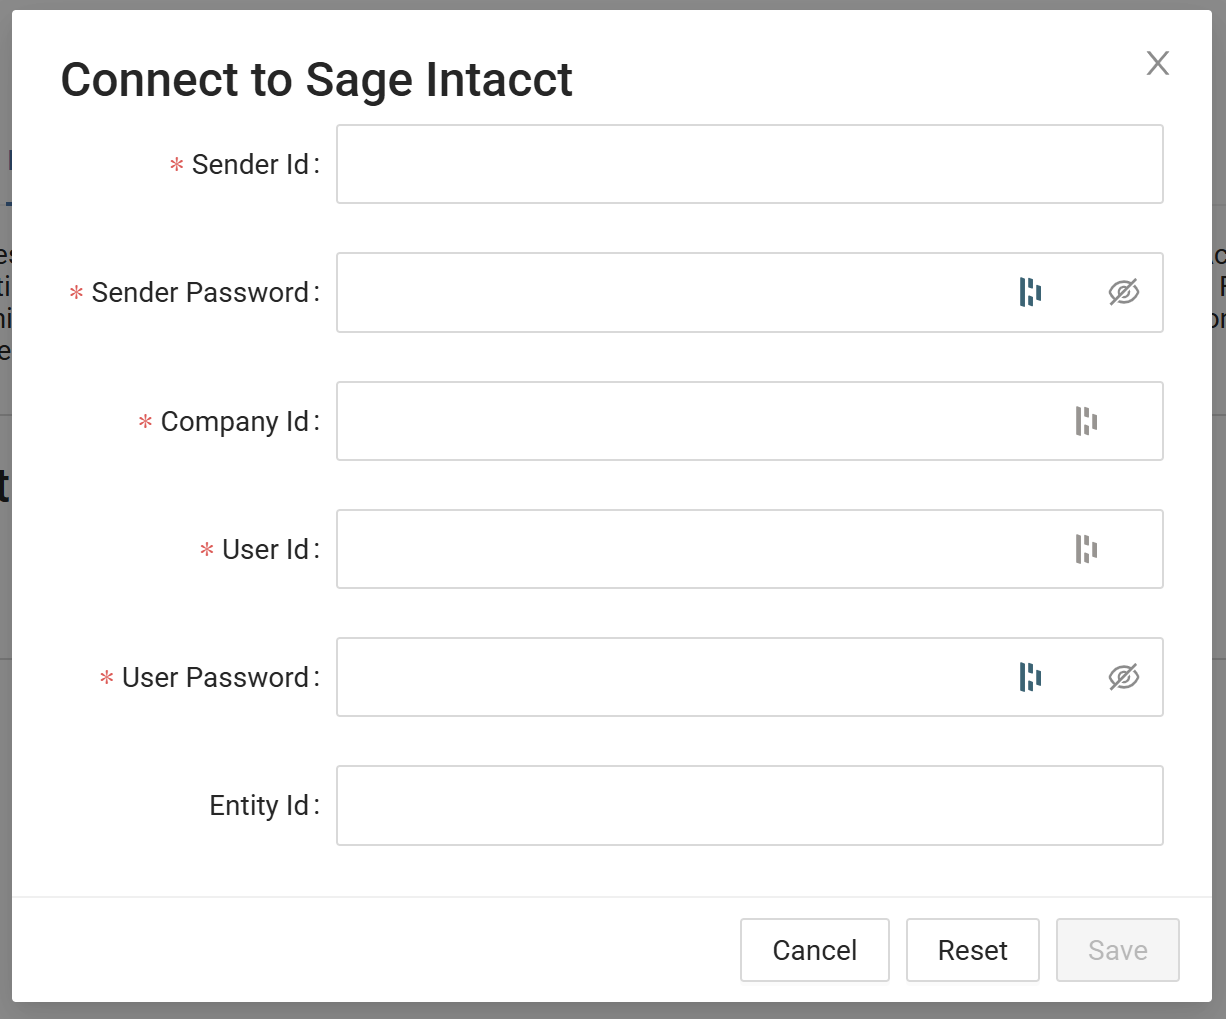
Step 1. Enter your Sender Id and Password
Your Sender Id is the Web Services Sender Id for the company. The Sender Id is provided with the purchase of the Sage Intacct Developers license. If you do not have a Developers License through Sage Intacct, please contact your Sage Intacct representative.
Sender ID: In Sage Intacct, navigate to Company >> Setup tab >> Configuration - Company >> Security Tab >> Web Services Authorization Section
Sender Password: The Sender Password would have been emailed when the Developer's License was purchased. If you DO NOT have a Sender Password, create a support ticket with Sage Intacct directly.
Step 2. Enter your Company Id
Each instance of Sage Intacct has a unique Company ID in Sage Intacct. This is used to identify your company.
Company ID: In Sage Intacct, navigate to Company >> Setup tab >> Configuration - Company >> General Information tab >> Company Information Section.
Step 3. Create a Custom Role
A custom role must be created to provide Accounting Link the minimum necessary permissions within Sage Intacct. A custom role is recommended so that as roles change, Accounting Link's functionality is not impacted.
To create a custom role in Sage Intacct, navigate to Company >> Admin >> Roles and click "Add" in the upper right on the screen.
Set "Accounting Link Online" as the role name.
Set the subscriptions below for the custom role, then save the role. (For the minimum necessary subscriptions, refer to the FAQ at the end of this article.)
- Company (Read-Only)
- Cash Management (All)
- General Ledger (All)
- Accounts Payable (All)
- Accounts Receivable (All)
Step 4. Create a Webservices User & Assign a Role
Setting up a Web Services user for Accounting Link allows Accounting Link to establish a connection with Sage Intacct.
To set up a Web Services user for Accounting Link, open Sage Intacct and navigate to Company >> Admin >> Web Service users >> Add in the upper right corner.
Create a Web Services User using the following information:
-
UserID: accountinglink
-
Username: accountinglink
-
Account email address: your preference - use an account you have access to (preferably a business email)
-
Contact Name: accountinglink
-
User Type: Business
-
Role: [Assign the role you created in Step 3 above]
-
Admin Privileges: Off
Once the Accounting Link Web Services User has been created in Sage Intacct, the "Account email address" will receive an email with a UserID and a password. Enter the UserID and password into the Accounting Link Online connection window.
Step 5. Assign an Entity Id
The Entity Id in the Accounting Link connection window dictates which entity Accounting Link has access to. Leaving the Entity Id field blank will connect Accounting Link to the Top Level Entity by default.
To find your available Entity Id's in Sage Intacct, navigate to Company >> Setup Tab >> Entities at the Top Level.
Frequently Asked Questions
What if I don't see an option to connect to Sage Intacct in Accounting Link Online?
-
Contact our support department for details at www.tbohelp.com or call us at (866) 964-9699.
I’d like to restrict the role permissions for Accounting Link further. Which subscriptions are absolutely required for the Accounting Link role?
- Company
- Departments (View)
- Locations (View)
- Class (View)
- Cash Management
- Credit Card Accounts (View, Add)
- Checking Accounts (View)
- Credit Card Transactions (Add)
- General Ledger
- Accounts (View)
- Journal Entries (Add)
- Accounts Payable
- Bills (Add)
- Vendors (Add - only if Advanced settings to create Vendors is enabled in Accounting Link)
- Accounts Receivable
- Customers (View, Add)
- Manage Payments (Add)
- Receive Advances (Add)
- Invoices (Add)
- Adjustments (Add)

